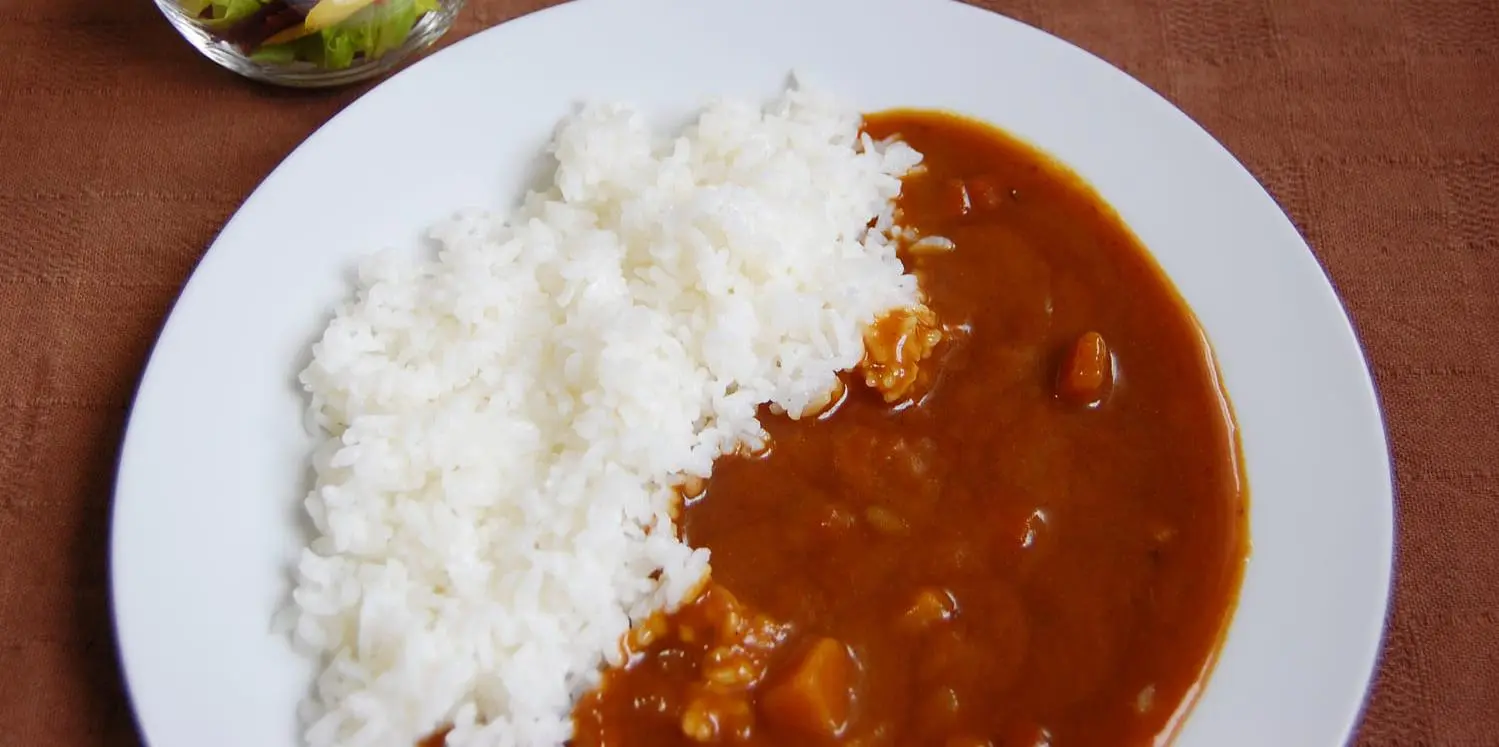
Japanese home-style curry rice usually features a mildly spiced, slightly thick roux with thinly sliced meat, carrots, and onions.
It’s nothing like the spice-forward curries of India or Thailand—so much so that Japanese curry has become its own distinct category.
Every household has its own recipe, and it often appears at weekday dinners or weekend lunches.
In fact, it’s a constant contender in Japan’s “Top 10 Favorite Foods” list. Narrow it down to “elementary school boys,” and it can even beat out sushi and ramen for the number-one spot—a true symbol of home cooking in Japan.
As for me, I practically lived on curry during my student years, eating it four or five times a week at the school cafeteria because it was cheap and filling. Even now, if I realize I haven’t made curry for a couple of weeks, that’s it—the decision for dinner is made. It’s that ingrained in daily life.
The best part? Japanese curry doesn’t require special spices or fancy tools.
It’s one of the easiest dishes to try if you want to cook for yourself while traveling.
In this guide, we’ll show you how to make a simple, satisfying curry rice using nothing more than a small Airbnb kitchen and a trip to the local supermarket.
Want more tips on cooking in a small Airbnb kitchen?
Check out our full guide here:


1. Equipment Needed
Airbnb kitchens often come with only the bare essentials.
But don’t worry—making Japanese curry doesn’t require much, and if something’s missing, you can usually find it at a 100-yen shop in Japan.
Basic items you’ll need
- Knife and cutting board
The ones provided in your Airbnb are usually fine. If the knife feels dull, you can pick up a sharpener at a 100-yen shop. - Frying pan (medium to large size)
A large pot will also work, but in many Airbnbs, the frying pan is actually bigger—and it’s often easier to wash. - Wooden spatula or ladle
For dissolving the curry roux and stirring the mixture. - Microwave
Used for heating pre-cooked rice packs.

2. Sourcing Your Ingredients
Here’s what you’ll need—all of it can be found at a nearby supermarket.
Curry roux is often located near the spice section or pasta sauces, but in most stores it occupies an entire shelf just for curry, so it’s hard to miss.
Vegetables are often sold in multi-packs, but if you think you won’t use them all, you can ask a staff member if they can sell you just one.
As for the other ingredients—honestly, almost anything works. Many households add potatoes, and in my own home, canned corn is a hit with the kids. Feel free to get creative and add whatever you’re in the mood for.
Ingredients (Serves 2)
- Curry roux: half a box
Note: The package usually says this makes 4–6 servings, but unless you eat very lightly, two people can easily finish it. If there are leftovers, consider it a head start on tomorrow’s breakfast.
If on day two you feel like eating something a little different, how about trying this idea:

If you don’t like spicy food: Vermont Curry (Medium Hot)

Cooking with kids: Vermont Curry (Mild)

If you like it spicier: Java Curry (Hot)

(For an authentic Japanese home-style taste, these two are my top recommendations. But any brand works—I switch it up depending on my mood.)
- Onion: 1 medium
- Carrot: 1
- Thinly sliced pork or your preferred beef: about 100g
Note: For pork, look for packs labeled butakoma (pork scraps), and for beef, kiriotoshi (trimmings). These are inexpensive—about 120–150 yen per 100g for pork, 300–400 yen for beef—and actually work better for curry than premium cuts. - Oil: as needed
Note: Use salad oil. If you don’t have any, check the meat section at the supermarket—many have free beef fat wrapped like small candies, which you can pick up when buying meat.
3. How to Cook
The basic cooking method is almost the same for any curry roux, so here’s the process based on the Vermont Curry package instructions.
Cut the meat and vegetables into bite-sized pieces—any shape is fine.
Notes are included where there are useful tips.
- Heat oil in a frying pan and sauté the ingredients over medium heat.
Note: Since you’ll be simmering them later, cooking them about 70% through at this stage is enough. - Add 850ml of water and bring to a boil, then simmer for about 15 minutes over low to medium heat.
Note: If you’re making a full box, use 1500ml of water.
If you don’t have a measuring cup, just use a glass (about 200ml) and estimate. Start with a slightly stronger flavor—you can always dilute it later by adding more water.
For Java Curry, the package says 700ml for half a box and 1300ml for a full box.
Most curry roux packages have instructions on the back, so check the numbers if you’re using a different brand. The text is in Japanese, but numbers are universal! - Turn off the heat, break the roux into pieces, and stir until completely dissolved.
Note: “Turn off the heat” is important. If you keep heating while adding the roux, it may not dissolve evenly. - Once the roux is dissolved, heat again and simmer over low heat for about 10 minutes, until thickened.
Note: 10 minutes is just a guide—it’s often done sooner. Aim for a consistency similar to slightly runny yogurt. - Serve over rice.
Note: If using microwaveable rice packs, heat them according to the package instructions (about 2 minutes at 600W), then plate the rice and ladle the curry on top.
4. Final Thoughts
So, how was it?
Surprisingly simple, right?
Even as you read this, thousands—maybe tens of thousands—of households across Japan are serving this very curry for dinner.
During your travels, why not experience a taste of the Japanese dinner table for yourself?
Authentic Japanese Souvenirs, Delivered
- Hotel delivery (no international shipping fees)
- Order before or during your trip and receive everything at your hotel
- Plan ahead and start sightseeing hands-free from day one
- Save time
- No more arriving in Japan only to find the souvenirs you wanted are sold out
- Skip the souvenir hunt and spend more time enjoying your trip
- All items are made in Japan
- Forget the worry of “Is this really made in Japan?”
- Every item is carefully selected and genuinely Japanese-made